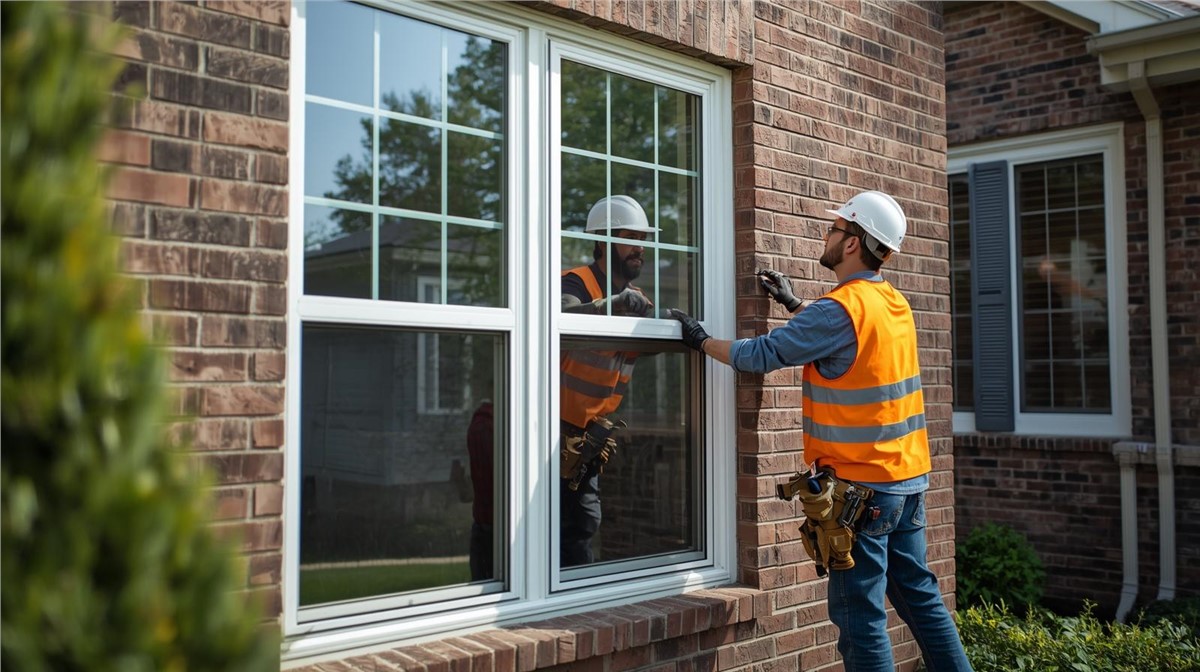
Window installation is one of the more disruptive exterior projects a Harvard, IL homeowner undertakes — but it does not have to be a stressful one. Knowing what the process involves from initial measurement through final cleanup, what good installation looks like at each stage, and what questions to ask before work begins turns a significant investment into a straightforward project with a predictable outcome. This guide walks through the full window installation process for northern Illinois homeowners.
Why Understanding the Process Matters
Most homeowners who have new windows installed see the before and the after — old windows out, new windows in, the house quieter and warmer. What happens between those two moments is largely invisible, and that invisibility is where the difference between a quality installation and a marginal one is determined.
Window installation involves a sequence of steps — rough opening preparation, flashing, air sealing, shimming, fastening, trim integration, and caulking — each of which affects how the window performs over its service life. A window that is properly shimmed, correctly flashed, and completely air-sealed delivers the thermal performance its ratings promise. A window that was installed quickly without attention to those details delivers something less — sometimes significantly less — regardless of how good the product specifications are.
Harvard is a community in McHenry County in northern Illinois, in a part of the state where winters push well below zero with wind chill, springs bring sustained rain and wind, and summers add heat and humidity that test every seal and joint in the building envelope. Windows installed here need to be installed correctly — not just set in an opening and caulked around the exterior. Understanding what correct installation involves gives homeowners the knowledge to recognize it and ask for it.
Before Installation Begins: Measurement and Product Selection
Accurate Measurement
Window installation begins with accurate measurement of every rough opening to be replaced. This step determines the window unit size ordered from the manufacturer — and errors at this stage cascade through every subsequent step.
Rough openings are measured width and height at multiple points — left, center, and right for width; top, middle, and bottom for height. Openings that are out of square — not uncommon in older Harvard homes where framing has settled over decades — require specific shimming strategies at installation that need to be anticipated at the measurement stage.
A contractor who measures once and orders is cutting a corner that occasionally produces a window that does not fit correctly. A contractor who measures at multiple points, notes any irregularity in the opening, and accounts for it in the order is doing the job correctly.
Product Selection for a Northern Illinois Climate
The windows ordered need to be appropriate for a McHenry County climate. The specifications that matter:
Frame material. Vinyl is the most common residential window frame material in northern Illinois — it insulates well, requires no painting, and handles freeze-thaw cycling without the dimensional instability that affects wood frames in high-moisture-cycling environments. Fiberglass is more dimensionally stable across extreme temperature ranges and is worth considering for homeowners prioritizing long-term performance.
Glass package. Double-pane with argon fill and low-e coating is the appropriate minimum specification for a northern Illinois home. Triple-pane is worth the additional cost on north and west-facing windows, or in rooms where winter comfort has been a persistent concern.
U-factor and SHGC. For a heating-dominated climate like Harvard's, a U-factor of 0.30 or below is the appropriate target for double-pane units. SHGC — the measure of solar heat admitted — should be moderate for most orientations, with lower values on west-facing windows to limit summer afternoon heat gain.
ENERGY STAR Northern zone certification confirms that a product meets the minimum performance thresholds for the climate zone — a useful baseline, though actual rated values matter more than the label alone.
The Installation Process: Step by Step
Day One Preparation
Before any window is removed, a professionally managed installation begins with preparation that protects both the interior and exterior of the home.
Interior protection. Furniture, flooring, and wall surfaces adjacent to each window opening are protected from dust and debris. Window installation involves cutting sealants, removing trim, and occasionally cutting into drywall or plaster — all of which produce material that lands on whatever is nearby. A contractor who takes time to protect the interior before work begins is establishing the tone for how the project will be managed.
Exterior preparation. Any landscaping, HVAC equipment, or exterior features close to the work area are protected or moved. Ladder placement and staging are confirmed before removal begins.
Removing Existing Windows
Existing windows are removed by cutting the interior and exterior caulk, removing interior trim or stops, and carefully extracting the window unit from the opening. In older Harvard homes with original wood windows, this process may also involve removing exterior casing, brick mold, or other exterior trim that is integrated with the original window installation.
During removal, the condition of the rough opening is fully revealed — often for the first time in decades. What is found at this stage determines whether the installation proceeds on the planned scope or whether additional work is needed.
What contractors look for when the opening is exposed:
- Rough opening framing condition. Sill plates, jack studs, and header framing are checked for rot, insect damage, and structural integrity. Framing that has been compromised by prior moisture infiltration at the old window needs to be repaired before a new window is installed in that opening.
- Existing flashing condition. Head flashing above the old window and any pan flashing at the sill are assessed. Properly installed original flashing in sound condition may be retained. Improperly installed, corroded, or missing flashing is replaced as part of the installation.
- Housewrap or building paper condition. The weather barrier at the rough opening edges is assessed. Torn, improperly lapped, or missing housewrap at the opening needs to be repaired or replaced before the new window goes in.
- Air sealing at the perimeter. Old insulation or sealant at the gap between the window frame and the rough opening is removed and will be replaced with current materials.
Any findings that require additional scope — framing repair, flashing replacement, housewrap repair — should be communicated to the homeowner with a cost estimate before proceeding. This is the stage where the project's actual scope is confirmed rather than assumed.
Rough Opening Preparation
With the old window removed and the opening assessed, preparation of the rough opening is the step that most determines long-term performance — and the one most commonly shortcut under schedule pressure.
Sill pan flashing. A sloped pan flashing installed at the base of the rough opening is the most critical moisture management detail in a window installation. It directs any water that infiltrates the window-to-wall joint at the sill outward and away from the rough opening — preventing it from reaching the framing below. Without a sill pan, water that gets past the window sits at the sill and works into the framing, producing the rot and moisture damage that many homeowners attribute to "old windows" but is actually a consequence of missing flashing from the original installation.
Sill pan flashing is installed before the window unit is set. It cannot be correctly installed after the window is in place. A contractor who installs windows without sill pans is skipping the most important moisture management detail in the opening.
Head and jamb flashing preparation. Housewrap at the head of the opening is prepared for integration with the head flashing that will be installed after the window is set. Proper sequencing — sill pan before window, head flashing after — is not arbitrary. It is the sequence that produces a drainage plane that sheds water correctly at every point around the opening.
Opening squareness check. The rough opening is checked for square — equal diagonal measurements from corner to corner — and any significant out-of-square condition is addressed with shimming strategy before the window is set. A window installed in an out-of-square opening without compensating shimming will not operate correctly, will not seal correctly at the sash, and may develop operational problems within a few years.
Setting the Window
With the rough opening prepared, the window unit is set into the opening and secured.
Shimming. Wood or composite shims are placed at the sill, jambs, and head to bring the window to level, plumb, and square — independent of any irregularity in the rough opening framing. Shimming is the adjustment mechanism that ensures the window unit is correctly positioned regardless of what the framing around it is doing. Insufficient shimming leaves the window relying on the rough opening framing for its squareness — and older northern Illinois homes do not have perfectly square rough openings.
Fastening. The window is fastened through the nail fin or mounting flange into the rough opening framing at specified intervals. Fastener placement and spacing follow manufacturer specifications — which matter for both structural performance and warranty validity.
Operation check. Before any flashing or trim is installed, every operable sash is opened and closed to confirm correct operation. A window that operates correctly at this stage, with the sashes moving smoothly and latching securely, is correctly shimmed and positioned. Operational problems at this stage are adjusted before flashing locks the window in place.
Head Flashing and Exterior Integration
After the window is set and confirmed to operate correctly, head flashing is installed above the window. Head flashing — a metal or rubberized strip that directs water running down the wall above the window over the top of the window frame and out, rather than into the rough opening at the head — is the component that prevents the most common type of window-related water infiltration.
Head flashing is integrated with the housewrap above in the correct sequence: the flashing goes on top of the housewrap at the sides and under the housewrap above — so that water running down the wall behind the cladding is directed over the top of the flashing and onto the exterior surface rather than behind it.
This integration detail is invisible once cladding is in place. It is entirely correct or entirely wrong at installation, and its consequences — water infiltration above the window — typically take a season or two of rain events to produce interior symptoms.
Air Sealing at the Frame Perimeter
The gap between the window frame and the rough opening framing — typically half an inch to an inch on each side — needs to be insulated and air-sealed. This gap is a significant air infiltration pathway when left unfilled — cold air moving through it bypasses the insulated wall and contributes directly to the drafts that window replacement is meant to address.
Low-expansion spray foam is the current standard for filling and air-sealing this gap. It expands enough to fill the space fully without the pressure that high-expansion foam would exert on the window frame — excessive pressure from the wrong foam can distort the frame and cause operational problems.
Backer rod and sealant are an alternative for the exterior perimeter of the gap. Whatever the approach, the goal is a continuous air barrier at the frame perimeter that eliminates the pathway for conditioned air to escape and unconditioned air to enter.
Interior Trim Installation
Interior trim — casing, jamb extensions if needed, and sill — is installed after air sealing is complete. In older Harvard homes where walls are thicker than the standard depth assumed in replacement window products, jamb extensions are required to bring the interior window surface flush with the finished wall — a detail that affects both appearance and interior air sealing continuity.
Interior trim is cut, fit, and secured with nails set below the surface and filled before painting. The quality of interior trim work is the most visible finished component of the installation — careful fitting, tight joints at corners, and clean nail fills distinguish professional work from rushed work.
Exterior Caulking
The joint between the window frame and the exterior cladding is sealed with a flexible paintable exterior caulk at every window. This joint moves with thermal cycling — the window frame and the cladding material expand and contract at different rates — and the sealant must accommodate that movement without cracking.
A sealant that is too rigid will crack within a season or two in a McHenry County climate. A sealant that is properly specified and applied — tooled into the joint at the correct depth and left with a concave profile that allows movement — will remain flexible and functional for a decade or more.
Final Cleanup and Inspection
A professionally managed window installation ends with a complete cleanup of each room — interior debris removed, surfaces wiped, furniture restored to position — and a systematic check of each installed window for operational correctness, exterior caulk completeness, and interior trim quality.
The homeowner walkthrough at the end of the project should cover every window installed — operating each sash, checking the latch and lock function, confirming exterior caulk is continuous with no gaps, and reviewing interior trim fit and finish. Any item that does not meet the standard discussed at project start is addressed before the project is considered complete.
Common Installation Shortcuts and What They Cost You
Knowing what a correct installation looks like also means knowing what shortcuts look like — and what they cost in performance terms.
No sill pan flashing. The most consequential shortcut in window installation. No immediate symptom. Water infiltration at the sill framing that develops into rot over a season or two of rain events.
Skipped air sealing. Spray foam around the frame perimeter takes ten minutes per window. Skipping it leaves the primary air infiltration pathway in place — defeating a significant share of the thermal improvement the new windows were purchased to deliver.
High-expansion foam at the frame. Using the wrong foam type distorts the window frame under expansion pressure. Operational problems — sashes that bind or gaps in the weatherstripping — develop within a season.
Head flashing not integrated with housewrap. Looks correct from outside. Allows water running behind the cladding above the window to enter the rough opening rather than shedding over the top of the frame.
Exterior caulk applied over dirty or wet surfaces. Caulk that does not bond to the substrate peels and gaps within the first season. Water infiltration at the frame perimeter begins at that point.
Shimming skipped on "close enough" openings. Windows in out-of-square openings without compensating shimming develop operational problems as the frame conforms to the irregular opening geometry over time.
How Long Window Installation Takes in Harvard, IL
The duration of a window installation project in Harvard depends on the number of windows, the complexity of each opening, and whether additional scope — framing repair, flashing replacement, or exterior trim work — is required.
A reasonable general guidance:
Single window replacement. Two to four hours for a straightforward replacement in a sound rough opening, including interior and exterior trim and cleanup.
Whole-house window replacement — 10 to 15 windows. Two to three days for a standard single-story or two-story home with no significant framing or flashing complications. Larger homes with more complex window configurations take longer.
Projects with framing repair or extensive flashing work. Additional time proportional to the scope of the additional work. A contractor should communicate any scope additions discovered during removal and provide a revised timeline before proceeding.
Weather is a realistic factor in northern Illinois window installation — a window opening that is open to the weather for the time it takes to set the unit is a brief but real exposure. Reputable contractors plan work to minimize that window, work in weather conditions that allow proper caulk cure, and temporarily protect openings if unexpected delays require it.
Working With a Local Contractor in Harvard, IL
McHenry County homeowners benefit from the same contractor selection principles that apply across the northern Illinois region. A contractor with established local presence and verifiable references from projects in the area brings accountability that matters when warranty questions arise after the project is complete.
Window installation is a trade where the quality of the work is largely invisible from the finished surface. The flashing, air sealing, and shimming that determine long-term performance are all hidden once trim is in place. This invisibility makes contractor selection more important — not less — than in trades where workmanship is visible after completion.
Huskie Exteriors serves homeowners and commercial property owners across Illinois and Wisconsin, handling roofing, siding, windows, gutters, and storm damage restoration. For Harvard homeowners planning a window installation project, the team brings the measurement precision, installation technique, and project communication that these investments deserve — from the first site visit through the final walkthrough.
Knowing What to Expect Makes the Project Go Better
A window installation project that is well-understood by the homeowner going in is a project that goes more smoothly — because the right questions get asked before work begins, the right scope gets established in the contract, and the right details get confirmed during the work rather than discovered in the warranty call afterward.
The details covered in this guide — sill pan flashing, head flashing integration, air sealing at the frame perimeter, shimming strategy — are not arcane knowledge. They are the standard of care for a window installation in a northern Illinois climate. A contractor who performs them correctly welcomes the questions. One who does not perform them correctly will not have good answers to them.
Contact Huskie Exteriors for professional roofing, siding, window, gutter, and storm damage services in Illinois and Wisconsin. If your Harvard, IL home is ready for new windows — or if you want to understand what a quality installation involves before selecting a contractor — our team is ready to walk you through the process and answer every question on the list.
Subscribe to Huskie Exteriors's Blog






Comments