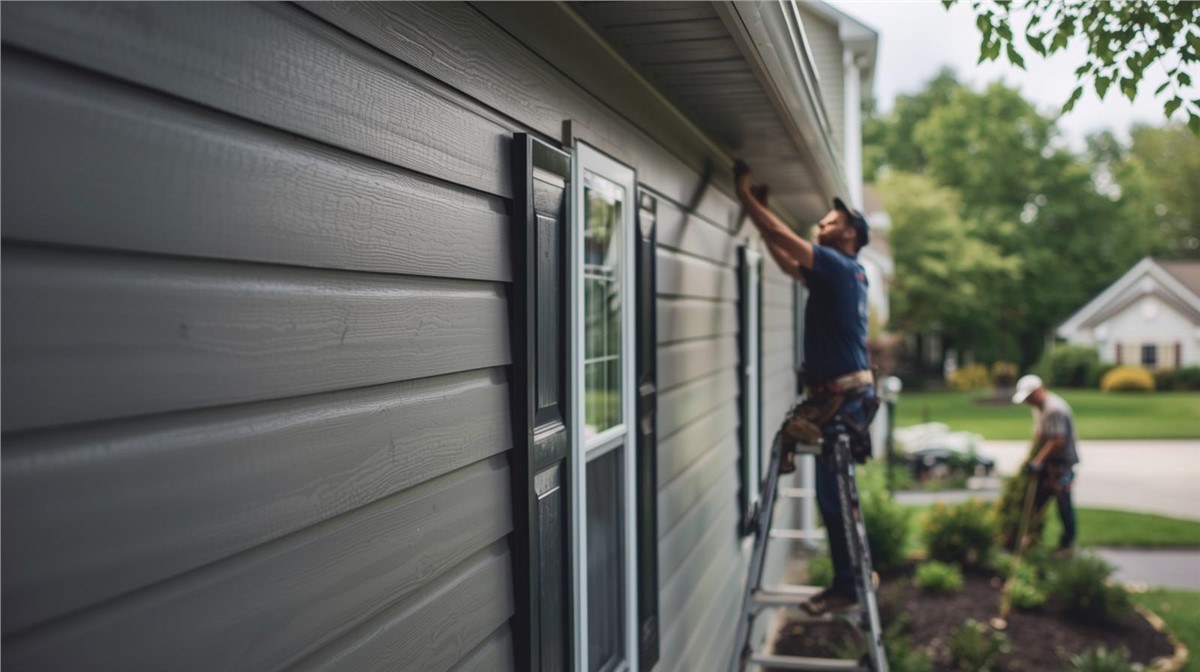
A siding installation project is one of the larger exterior investments a Monroe, WI homeowner makes — and one where the gap between a well-managed project and a poorly managed one shows up for decades. Knowing what the process actually involves, what good contractor communication looks like, and what to watch for at each stage helps you get the outcome the investment deserves. This guide walks through the full siding installation process from initial assessment to final walkthrough.
Why Knowing the Process Matters
Most homeowners approach a siding project with two questions: how much will it cost and how long will it take. Those are reasonable starting points, but they leave out the information that actually determines whether the project goes well — what happens between the contract signing and the final invoice.
Siding installation involves more decisions, more moving parts, and more opportunities for shortcuts than most homeowners realize going in. Material selection, substrate preparation, weather barrier installation, flashing at every window and door, trim integration, and final detailing all happen largely out of sight once work begins. A homeowner who understands what each phase involves is better positioned to ask the right questions, recognize when something is being done incorrectly, and hold a contractor accountable to the scope they were paid to deliver.
Monroe is a community in Green County in southwestern Wisconsin, in a part of the state that sees genuine four-season weather stress. Wisconsin winters bring significant snow, ice, and freeze-thaw cycling that test every joint and seam in an exterior cladding system. Spring and summer bring rain, wind, and the occasional hail event that affects southern Wisconsin properties. Getting a siding installation right in this climate means attending to details that mild-climate installations can sometimes get away with ignoring.
Phase One: Assessment and Material Selection
A siding installation project begins before a single panel is removed. The assessment phase determines what the project actually involves — and what it will cost.
What a Thorough Pre-Installation Assessment Covers
A contractor worth working with does not simply measure the wall area and write a number. A complete pre-installation assessment includes:
Existing siding condition. The condition of the existing siding affects the removal scope and what will be found beneath it. Siding that has been in place for 30 or more years may have moisture damage in the substrate beneath it — soft sheathing, compromised housewrap, or rot at grade-adjacent sections — that needs to be addressed before new siding goes on. A contractor who looks only at the surface and not at what is beneath it is setting up a mid-project surprise.
Substrate and sheathing inspection. Where existing siding can be probed or partially lifted, a thorough contractor checks the sheathing beneath for soft spots, delamination, and evidence of prior moisture infiltration. This assessment is necessarily limited before full tear-off, but experienced contractors know where to look — at the base of walls, around window and door openings, and at any area where the existing siding shows signs of moisture-related failure.
Housewrap condition. If the existing housewrap is visible at any point — at damaged siding sections, at penetrations, or at areas where siding has already been partially removed — its condition is assessed. Housewrap that has been degraded by UV exposure, torn at fastener points, or improperly lapped needs to be replaced rather than covered. New siding installed over failed housewrap lacks a functional secondary moisture barrier regardless of how well the siding itself is installed.
Window and door condition. A siding installation is an opportunity to address the flashing and integration around every window and door on the building — the most common moisture infiltration points in any wall system. A contractor who assesses window and door condition as part of the siding assessment is thinking about the project correctly. One who treats siding and windows as entirely separate scopes is missing the integration opportunity that makes the full system perform.
Material selection discussion. The assessment phase should include an honest conversation about material options — what is appropriate for the home's architectural style, what performs well in a Green County, Wisconsin climate, what the realistic maintenance requirements are for each option, and what the cost implications of each choice are. A contractor who defaults immediately to a single material without discussing options is not giving the homeowner the information needed to make a sound decision.
Material Selection for a Monroe, WI Home
Green County's climate imposes similar demands on exterior cladding as northern Illinois — significant freeze-thaw cycling, snow and ice exposure, spring rain and wind, and summer UV intensity. The material options appropriate for Monroe homeowners are the same ones relevant across the Wisconsin-Illinois border region:
Vinyl siding remains the most widely installed choice — low maintenance, handles freeze-thaw cycling well in mid-grade and premium panel thicknesses, and available in profiles and colors that suit most residential architectural styles. For Monroe homes, mid-grade product at .044 inches or better is the appropriate minimum specification.
Fiber cement offers superior impact resistance and dimensional appearance at a higher upfront cost and with a periodic repainting requirement. It suits homes where architectural character benefits from a more dimensional material and where the homeowner is prepared for the maintenance commitment.
Engineered wood provides a natural wood aesthetic with better moisture performance than solid wood — appropriate for homeowners who want the wood look without wood's full maintenance demands.
Metal panel suits contemporary and modern farmhouse architectural styles and offers exceptional longevity with minimal maintenance.
The material selection conversation should address not just the field panels but the trim system — corner posts, window and door surrounds, fascia, and soffit — which determines how the installation looks at every edge and transition.
Phase Two: Contract and Project Preparation
Once material selection is complete and a contractor has been chosen, the contract and project preparation phase sets the foundation for how the work itself goes.
What a Complete Contract Should Include
A siding installation contract should specify:
- Material manufacturer, product line, color, and profile
- Housewrap specification — whether existing is being retained or replaced, and with what product
- Flashing scope — at windows, doors, roof-to-wall transitions, and penetrations
- Trim scope — what trim components are included and what material they are
- Soffit and fascia scope — whether these are included or excluded
- Tear-off scope — how many layers, what disposal arrangement
- Decking and substrate repair — allowance or assessment process
- Permit — included or excluded, and who is responsible for pulling it
- Timeline — start date, estimated duration, and weather delay communication process
- Payment terms — deposit amount, milestone payments if any, and final payment timing
- Workmanship warranty — duration and what it covers
Any scope item that is not in the contract is either not included or subject to dispute when it comes up mid-project. Verbal commitments made during the sales conversation are not enforceable if they are not in the written contract.
Pre-Project Logistics
Before installation begins, several logistics need to be coordinated:
Permitting. In Green County and Monroe specifically, building permits are typically required for siding replacement projects — particularly those involving changes to the building envelope. A contractor who handles permitting as part of the project scope is operating correctly. One who suggests proceeding without a permit is creating liability for the homeowner.
Material delivery and staging. Siding panels, trim components, and accessory materials need to be delivered and staged in a location that does not block access to the work area, does not damage landscaping, and keeps materials protected from weather until installation. How a contractor manages material staging is an early indicator of how organized the project will be overall.
Protection of landscaping and property. Tear-off generates debris — old siding, fasteners, housewrap, and trim material that lands in landscaping and on paved surfaces. A contractor who takes time before work begins to protect plantings adjacent to the work area and commit to a magnetic nail sweep at project completion is one who takes care of the details.
Phase Three: Tear-Off and Substrate Preparation
This is the phase that determines what the project actually costs and reveals the true condition of the wall system beneath the existing cladding.
What Happens During Tear-Off
Tear-off involves removing existing siding panels, trim components, and in most cases the existing housewrap — exposing the sheathing beneath. This is the point at which the pre-installation assessment is validated or revised.
What contractors look for during tear-off:
- Sheathing condition — soft spots, delamination, rot, and moisture damage that was not accessible during the pre-installation assessment
- Housewrap condition — whether existing housewrap is intact, properly lapped, and worth retaining, or needs replacement
- Flashing condition at windows and doors — whether existing head flashing, pan flashing, and sill pan details are correct and intact, or need to be rebuilt
- Evidence of prior pest activity — insulation damage, framing compromise from carpenter ant or wood-boring insect activity that was concealed beneath the siding
Any findings that require additional scope — sheathing repair, flashing reconstruction, pest damage remediation — should be communicated to the homeowner with a cost estimate before work proceeds. A contractor who addresses scope additions without homeowner communication is not operating transparently.
Housewrap Installation
New housewrap installation is one of the most consequential steps in a siding project — and one of the most frequently shortcut by contractors under schedule pressure.
Proper housewrap installation involves:
- Starting at the base of the wall and working upward, with each course lapped over the one below it — not stapled in random sections or installed in reverse lap order
- Taping all seams with housewrap tape compatible with the specific product — untaped seams are potential infiltration points that the field installation of siding cannot compensate for
- Integrating with window and door flashing — housewrap needs to be cut, folded, and taped into window and door openings in a specific sequence that coordinates with the flashing installation
- Fastening with cap nails or cap staples at appropriate spacing — not with standard staples that pull through in wind events before siding is installed
A housewrap installation that is rushed, improperly lapped, or inadequately taped is a compromised secondary moisture barrier from day one. It is invisible once siding is installed and its failures reveal themselves slowly, through moisture infiltration that produces interior symptoms months or years after installation.
Phase Four: Flashing, Windows, and Penetrations
Flashing is where most siding system failures originate — and where the most consequential installation details happen largely out of sight.
Window and Door Flashing
Proper window and door flashing involves a specific sequence of components:
Sill pan flashing is installed at the bottom of the window opening before the window is set — a sloped pan that directs any water that infiltrates the window frame joint outward and away from the rough opening. Without a sill pan, water that gets past the window sits at the sill and works into the framing below.
Head flashing is installed above the window after it is set — a metal or rubberized flashing that directs water that runs down the wall above the window over the top of the window frame and out, rather than into the rough opening. Skipped head flashing is the primary cause of water infiltration above windows.
Side flashing integration with the housewrap ensures that water moving down the wall behind the siding is directed over and around the window rather than into the opening at the jambs.
These components need to be installed in the correct sequence — sill pan before window, head flashing after window, integrated with housewrap laps in the correct order. A contractor who installs windows and then installs housewrap without integrating the flashing sequence correctly has created a system that looks complete but functions incorrectly.
Utility Penetrations
Every penetration through the siding — hose bibs, dryer vents, electrical boxes, cable entries, gas line penetrations — needs to be flashed and sealed independently. The siding system's ability to manage bulk water does not extend to penetrations without specific detailing at each one. A contractor who installs siding up to a penetration and applies a bead of caulk around the cover plate is doing the minimum — not the correct detail.
Phase Five: Siding Installation
With substrate preparation, housewrap, and flashing complete, the siding installation itself is the most visible phase — and the one where installation technique determines how the system performs through decades of Wisconsin weather.
The Installation Details That Matter
Starter strip at the base. A level starter strip installed at the base of the wall establishes the alignment for every course of siding above it. A starter strip that is not level, or that is omitted in favor of a notched first panel, produces a wall that looks correct initially and reveals its misalignment as thermal movement causes panels to shift.
Nailing technique. Vinyl siding must be nailed through the center of the nail slot — not tight, not at the slot edge, and not through the face of the panel. Nails driven tight prevent the thermal movement that vinyl requires across Wisconsin's temperature range and cause buckling. This is a technique detail that is invisible once the panel is installed and its consequences appear the following summer when panels bow outward on a hot day.
Panel overlap at seams. Horizontal seams between panel lengths need adequate overlap — typically one inch minimum — to manage wind-driven rain and allow thermal movement without creating gaps at the seam. Seams need to be staggered — no two adjacent courses should have seams aligned vertically, which creates a visual line and a concentrated water pathway.
Trim installation sequence. Corner posts, J-channels at window and door surrounds, and utility trim need to be installed before field panels — not after. Panels that are cut and slipped under trim that was installed after creates a weaker joint than panels that are run into pre-installed trim channels.
Clearance at grade. Siding panels need to maintain clearance above grade — typically a minimum of six inches from soil and two inches from hard surfaces — to prevent moisture wicking and pest entry at the base of the wall. A siding installation that runs panels to grade is setting up a moisture problem at the most vulnerable section of the wall.
Phase Six: Final Inspection and Walkthrough
A professionally managed siding project ends with a formal walkthrough — not just a "we're done, here's the invoice" conversation at the driveway.
What a Final Walkthrough Should Cover
Visual inspection of all elevations. Every wall surface should be reviewed for consistent panel alignment, proper seam staggering, complete trim engagement, and any panels that have not fully seated in their locking channels.
Trim and detail inspection. Every corner, every window and door surround, every utility penetration, and every transition between siding and adjacent surfaces — roofline, foundation, and any architectural details — should be reviewed for complete caulking, proper fit, and clean appearance.
Gutter and drainage review. If gutters were removed and reinstalled as part of the project, their condition, slope, and hanger attachment should be verified. Downspout discharge points should be confirmed functional.
Cleanup confirmation. Magnetic nail sweep completed, debris hauled away, landscaping protection removed and any displaced plantings restored, driveway and walkways clear of fasteners and material waste.
Documentation. The contractor should provide the homeowner with manufacturer warranty documentation, product specifications for insurance purposes, and the written workmanship warranty as delivered.
What Good Contractor Communication Looks Like Throughout the Project
The quality of a siding installation project is not determined only by what happens on the wall. It is also determined by how the contractor communicates throughout the process.
Good communication on a siding project looks like:
- A confirmed start date provided in writing, not just verbally
- Daily or end-of-day update when significant progress milestones are reached
- Immediate notification when tear-off reveals substrate or flashing issues that affect scope or cost — with a written change order before additional work proceeds
- Clear communication about weather delays — what the plan is and when work will resume
- Accessibility of the project supervisor throughout the project — not just during the sales process
Communication failures — unreturned calls, undisclosed scope additions, unexplained delays — are the source of most homeowner dissatisfaction on exterior projects. A contractor whose communication is as organized as their installation work is the one worth finding and keeping.
Working With a Local Contractor in Monroe, WI
Green County homeowners benefit from the same considerations that apply across the Illinois and Wisconsin service area — a contractor with established local presence, verifiable references from projects in the area, and accountability to a local reputation is meaningfully different from an out-of-area operation.
A contractor who knows Green County's climate, understands local permitting requirements, and has supplier relationships in the Wisconsin market brings practical advantages beyond general competence. They are also present for warranty service when questions arise after project completion — which is the moment when local accountability matters most.
Huskie Exteriors serves homeowners and commercial property owners across Illinois and Wisconsin, handling roofing, siding, windows, gutters, and storm damage restoration. For Monroe homeowners planning a siding project, the team brings the installation experience, material knowledge, and project management approach that these investments deserve.
What to Expect — and What to Insist On
A siding installation done right involves more than panels on a wall. It involves substrate preparation that addresses what is beneath the existing cladding, housewrap installation that functions as a genuine secondary moisture barrier, flashing at every window and door that manages water at the most vulnerable points, and installation technique that accounts for the thermal movement and weather exposure that a Wisconsin exterior faces every year.
The homeowners who get that outcome are the ones who know what to expect, ask the questions that confirm it is happening, and work with contractors who welcome those questions rather than deflecting them.
Contact Huskie Exteriors for professional roofing, siding, window, gutter, and storm damage services in Illinois and Wisconsin. If your Monroe, WI home is ready for a siding project, our team is ready to walk you through every phase — from material selection to final walkthrough — with the communication and craftsmanship the investment deserves.
Subscribe to Huskie Exteriors's Blog







Comments