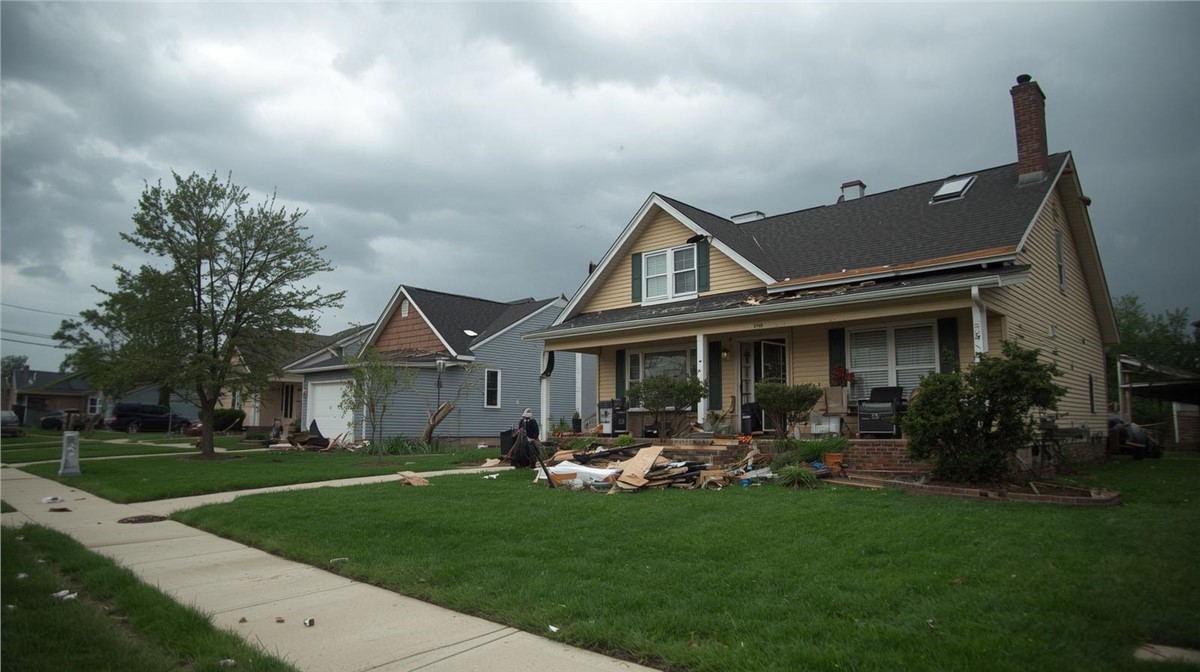
If a major storm just hit your Illinois neighborhood, what you do in the next 24 hours can make a monumental difference in your insurance claim. The storm has passed, but for many homeowners, the stress is just beginning. Looking at a damaged roof or flooded basement can feel overwhelming, but this guide will turn that confusion into a clear, actionable plan. Let’s get you started on the right foot.
Your first priority is always safety. Before assessing any damage, be absolutely certain to stay away from downed power lines and be careful of broken glass or unstable structures. Once the area is secure, your most critical job begins: creating undeniable proof of the storm’s impact. Knowing exactly how to document storm damage for insurance is the single most powerful tool you have in the claims process.
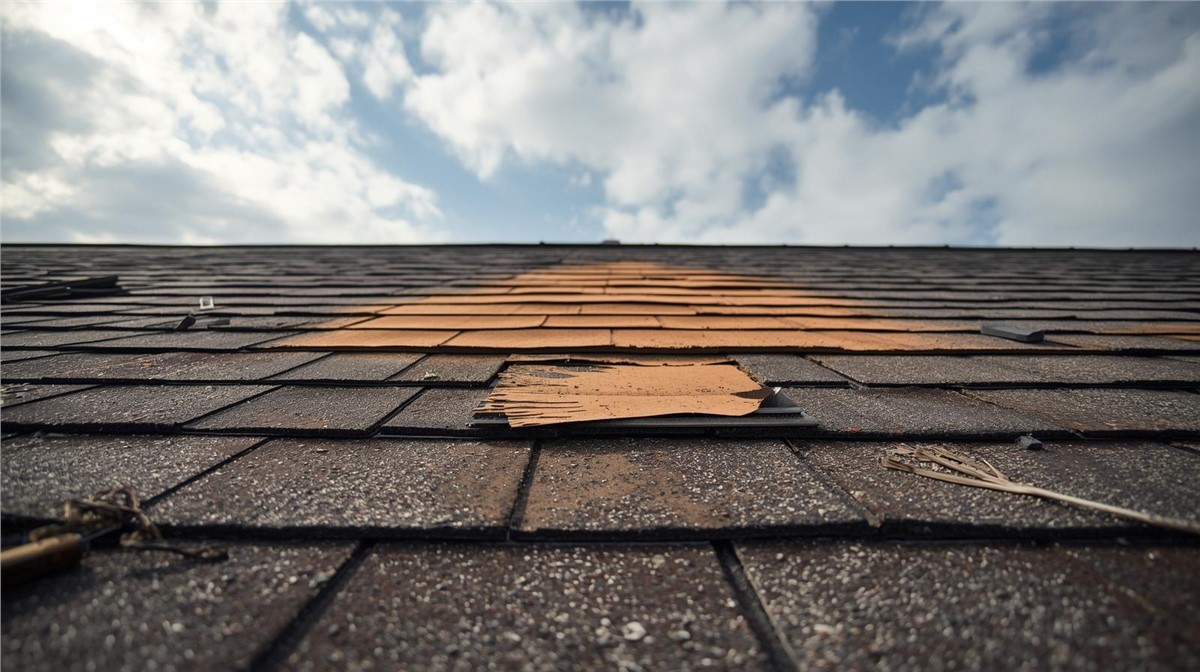
In practice, this means becoming a detective with your smartphone. Start by taking wide-angle photos of each side of your home to establish the overall scene. Then, move in for the details. For a common hail damage roof insurance claim in Illinois, insurers and contractors agree that scale is crucial. Place a coin or a measuring tape next to dents on your siding, shingles, or downspouts to create clear, indisputable evidence of their size and severity.
Finally, you must take steps to prevent the damage from worsening. Covering a leaking section of your roof with a tarp or boarding up a broken window are considered essential temporary repairs after storm damage insurance companies expect you to perform. Keep the receipts for any materials you buy for these fixes; according to standard industry practice, these reasonable costs should be reimbursed as part of your final claim settlement.
How to File Your Wind or Hail Damage Claim in Illinois
With your photos in hand, your next move is to officially start the insurance claim process. You generally have two options: calling your local insurance agent directly or using the company’s 24/7 national claims hotline (often an 800 number). While your agent offers a personal touch, the national hotline is usually the quickest way to get the ball rolling, especially right after a major storm when local offices might be swamped.
To make that first call as smooth as possible, have three key pieces of information ready: your policy number, a brief description of the damage, and the date the storm occurred. Having this handy prevents a stressful scramble while you're on the phone and shows the company that you're prepared.
During this call, you’ll be given a claim number. Think of this as the official tracking code for your entire case. From this moment on, every photo, conversation, and document will be tied to it. Write your claim number down and keep it somewhere safe. While getting this number is straightforward, how your insurer calculates your final payment is more complex, and it all hinges on one critical detail in your policy.
ACV vs. RCV: The Policy Detail That Can Cost You Thousands
That one critical detail in your policy determines how your insurer will pay for your storm damage. It all comes down to whether your policy provides for Replacement Cost Value (RCV) or Actual Cash Value (ACV). Understanding your homeowners policy for storm damage starts here, as the difference between these two can mean a gap of thousands of dollars in your final settlement check.
Imagine the storm destroyed your 10-year-old roof. A Replacement Cost Value (RCV) policy aims to pay for a brand-new roof of similar quality today. In contrast, an Actual Cash Value (ACV) policy pays only for what your 10-year-old roof was worth right before the storm hit. Just like a used car, your used roof is worth much less than a new one.
This difference between the new cost and the used value is called depreciation. It’s the value your property loses over time due to age and normal wear. For an ACV policy, an insurer will calculate the cost to replace your roof and then subtract a large amount for depreciation, leaving you to cover the rest. This calculation is a common point of contention in many water damage insurance claims in Illinois.
So how do you know which coverage you have? You can find this information on your Policy Declarations Page, which is the summary of your coverage typically found at the front of your insurance documents. Knowing whether you have RCV or ACV prepares you for what to expect when the insurance adjuster visits.
What to Expect When the Insurance Adjuster Visits
After you file a claim, your insurer will send an insurance company adjuster to your home. Understand their role: while they are usually professional and courteous, their job is to assess the damage from the insurance company's perspective. They are there to create an official record of the loss for their employer, which is used to determine your payout.
Don’t just stand by while they conduct their inspection. This is your opportunity to be an active participant. Walk with the adjuster and use your photos and notes to point out every instance of damage you've found, from the smallest dents on your siding to the specific shingles you believe are compromised. By guiding them through your findings, you help ensure nothing gets overlooked in their initial assessment.
Before the adjuster leaves, ask them three direct questions: “When can I expect a copy of your report?”, “What is the general timeline for a decision on my claim?”, and “Who is my primary contact person from now on?” Their answers help set clear expectations and establish a timeline for you to follow.
The adjuster’s final report, often called the scope of damage, is the foundation for your settlement offer. It will itemize the necessary repairs and estimate the costs, applying your policy’s ACV or RCV calculation. Understanding this document is the next critical step, as it directly translates into the offer you will receive.
How to Read Your Settlement Offer and Spot Potential Gaps
A few days or weeks after the adjuster's visit, you'll receive a packet of documents that form your initial Settlement Offer. The most important part is the line-item estimate, which breaks down the repair costs piece by piece—from the cost of shingles per square foot to the price of new gutters. Don't just look at the final number. Scrutinize each line to ensure it matches the scope of damage you documented. Is anything missing?
As you look at the summary page, you'll notice the check you receive won't match the total repair cost. That’s because the insurance company first subtracts your deductible. If the approved repairs total $15,000 and you have a $1,000 deductible, the insurance company's total responsibility is $14,000.
Next, you will almost certainly see a deduction for Recoverable Depreciation. This can be a confusing part of the process. Your insurer first pays you the Actual Cash Value (ACV) of your damaged property—what it was worth right before the storm. The depreciation amount is held back until you complete the work and submit a final invoice from your contractor. Once you prove you've made the repairs, the company releases this second payment, bringing you to the full Replacement Cost.
Carefully reviewing this initial estimate is your first and best tool for negotiating a low insurance settlement for roof damage. If the costs are too low or items are missing, the offer isn't final. It’s the starting point for a conversation to get the fair amount you need to make your home whole again.
What to Do If the Insurance Settlement for Your Roof is Too Low
Receiving a settlement offer that won’t even cover the repairs can be disheartening. Your first step in negotiating a low insurance settlement for roof damage is to get a detailed, line-item estimate from a reputable local contractor. This independent quote serves as concrete evidence, showing your insurer the real-world cost of materials and labor in your area and highlighting anything their adjuster may have missed.
With your contractor’s bid in hand, you can formally ask for more by filing a Supplemental Claim. This is a standard process for adding missed items or correcting underestimated costs. You submit the new estimate to your insurance company, which is then obligated to review the new information and respond to your request for additional funds. It's not an argument; it's a formal request based on new evidence.
If there's still a large disagreement on a major claim, consider hiring a public adjuster for storm damage in Illinois. Unlike the insurance company’s adjuster, a public adjuster works directly for you. These are licensed professionals who manage your entire claim and negotiate on your behalf, typically for a percentage of the final settlement. This levels the playing field by pitting an expert against an expert.
Was Your Illinois Storm Damage Claim Denied? Here Are Your Rights
Receiving a formal denial letter can feel like a final, frustrating end to a long process. Before you accept the decision, it’s crucial to understand why your claim was denied. If your homeowners insurance claim is denied in Illinois, your first step is to read the denial letter carefully. Common—and often disputable—reasons include:
The damage was classified as pre-existing “wear and tear,” not caused by the recent storm.
Your policy doesn’t cover the specific type of damage, like flooding from groundwater.
The claim was not filed within the required time frame listed in your policy.
Your immediate next step is to use the company’s internal Appeal Process. A claim denial is a formal business decision, and you have the right to formally ask for a reconsideration. Your denial letter is required to explain the steps for filing an appeal. This gives you a structured way to present new evidence, such as an independent contractor’s report that directly contradicts the insurer’s findings.
If your internal appeal is rejected and you believe the denial is unfair, you have a powerful, impartial ally. The Illinois Department of Insurance (IDOI) is a state agency that helps protect consumers. You can start the official Illinois Department of Insurance complaint process online or by mail. They will review your case to ensure your insurance company acted according to Illinois law, which prevents insurers from denying valid claims in “bad faith.”
Final Steps for a Successful Illinois Storm Damage Claim
Just a short while ago, the thought of an insurance claim may have felt as chaotic as the storm itself. Now, you have a roadmap. You know to document everything first, file your claim promptly, meet the adjuster prepared, and carefully review their offer. This knowledge alone puts you in a much stronger position.
As you finish the Illinois homeowners insurance claim process, remember to handle the final payments wisely. If a settlement check is made out to both you and your mortgage company, contact them immediately for their endorsement process. Most importantly, never pay a contractor in full until the job is 100% complete to your satisfaction. This simple step is your final layer of protection.
You are no longer just a homeowner with a problem; you are an informed partner in your home's restoration. This process isn’t about confrontation, but about clear communication and knowing your rights. Trust the steps you've learned and the detailed records you’ve kept. You have the advice needed to see this through and get your home back to normal.
Subscribe to Huskie Exteriors's Blog


Comments